JSP Introduction
Simple JSP(Example-1)
JSP Err.Pag.(Example-2)
JavaBeans in JSP
JavaBeans(Example-3)
JSP Custom Tags
CustomTag(Example-4)
Design Patterns
Design Patt.(Example-5)
Bookmark This Site
|
Simple Example for using JavaBeans in JSP (Continue...)
|
Introduction
|
JavaBeans component design conventions govern the properties of the class, and the public methods that give access to the properties.
A JavaBeans component property can be:
- Read/write, read-only, or write-only.
-
It means it contains a single value, or indexed, i.e. it represents an array of values.
There is no requirement that a property be implemented by an instance variable; the property must simply be accessible using public methods that conform to certain conventions:
- For each readable property, the bean must have a method of the form:
PropertyClass getProperty () { ... } -
For each writable property, the bean must have a method of the form:
setProperty (PropertyClass pc) { ... }
In addition to the property methods, a JavaBeans component must define a constructor that takes no parameters.
CLICK HERE to download this complete example (zip file)
|
|
|
Steps to deploy and run this JSP using JavaBean Project (Continue ...)
|
-
Next goto Start -> Programs -> Sun Microsystems ->Application Server PE -> Deploytool. CLICK HERE to see how to Start the Deploytool
Now in the deploytool,
- Goto File ->New -> Application
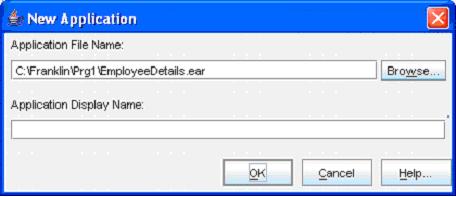
(Click the Browse button)
-
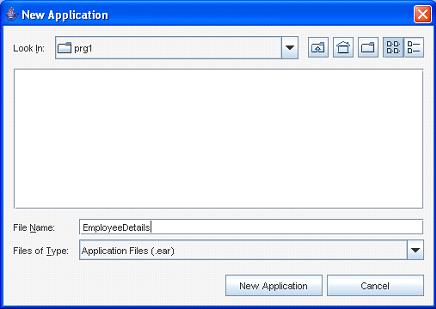
(Select the folder in the Look In dropdown box, and then give a file name "JavaBeansInJsp". Next click the New Application button)
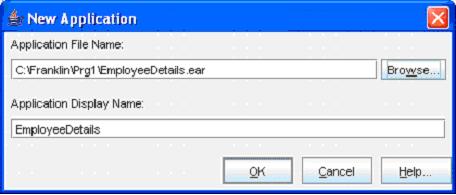
(Click the OK button)- Now goto File -> Save to save the file
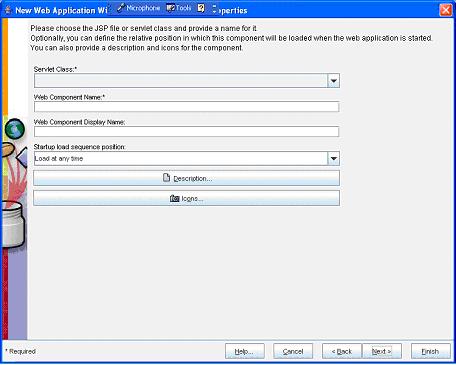
- Next, goto File -> New -> Web Component
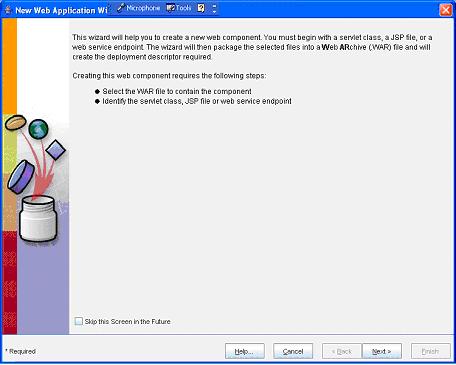
(Click Next button)
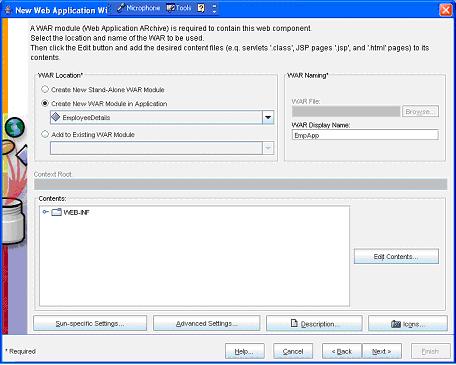
(Enter the WAR Name as "JspApp" and then click the Edit Contents
button)

(Select all the .class, .jsp , .tld and .html files and click the Add button)
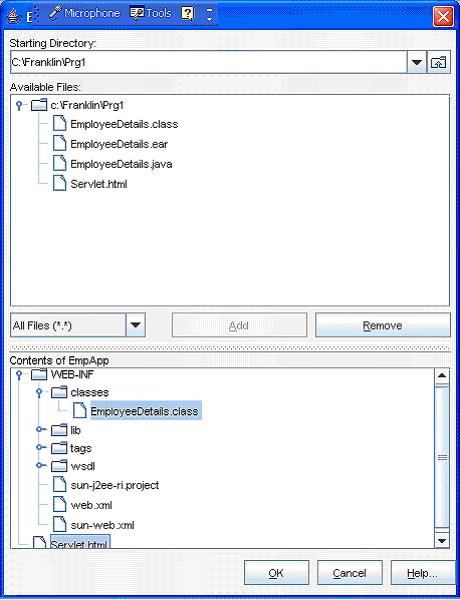
(Now click the OK button)
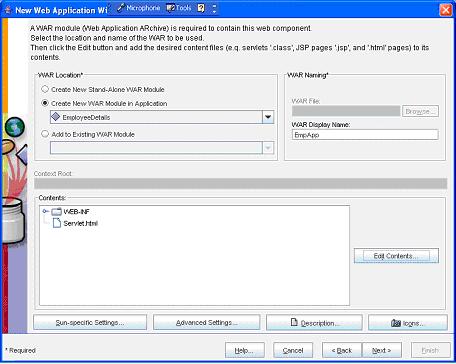
(Now click the Next button)
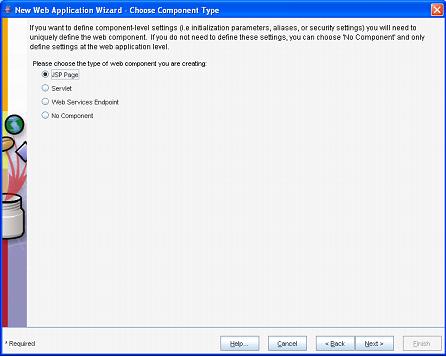
(Now select the JSP Page option button and then click the Next button)
(Now select the "GetAuthorName.jsp" from the Servlet Class dropdown box)
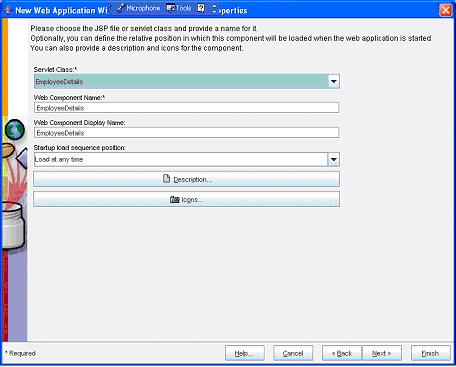
(Now select the Next button)
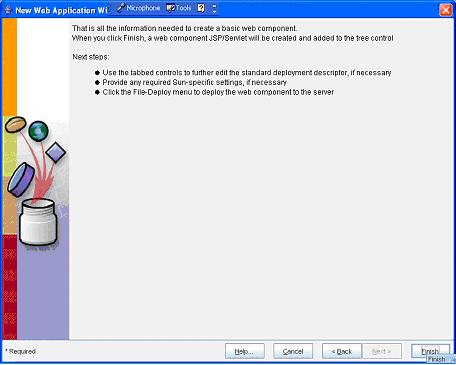
(Now select the Finish button)
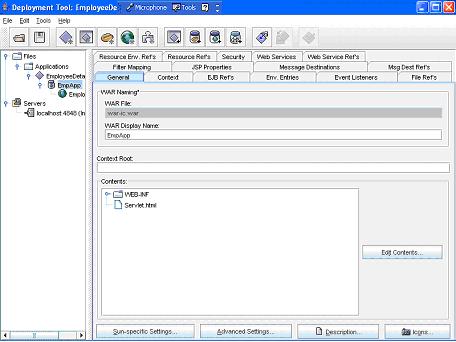
(Now select the JspApp in the left pane and select the General tab in the right pane. Here give a name bean_jsp in the Context Root text box)- Note: Here, it is not compulsory to give the Aliases name because the client HTML file directly calls the JSP file
- Now goto File ->Save
- Next goto Tools -> Deployee
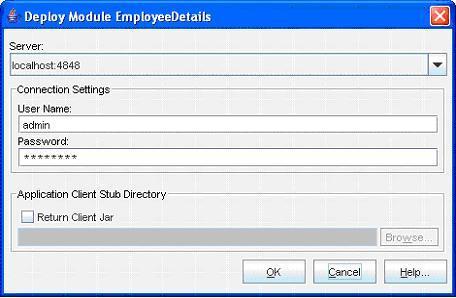
(Enter the User Name as admin and Password as password (CLICK HERE for password). Next click the OK button)
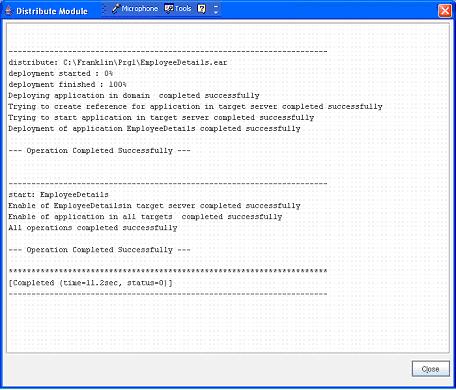
(Now a message --- Operation Completed Successfully --- must display. Next click the Close button)- Next goto File -> Exit to close it
- Now open an Internet Explorer
- Type the address http://localhost:8080/bean_jsp/WelcomePage.html
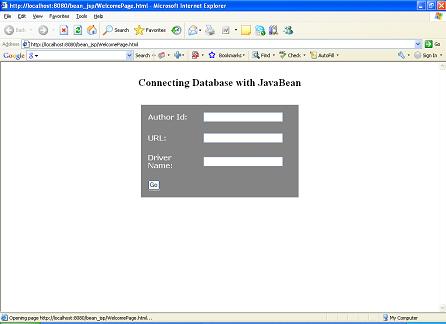
- Now give the values as follows
| Author Id | : 1 | | URL | : jdbc:odbc:Sample1 | | Driver Name | : sun.jdbc.odbc.JdbcOdbcDriver |
- Now click the Go button
- Program completed Successfully
- To stop the server goto Start -> All Programs -> Sun Microsystems -> Application Server PE -> Stop Default Server. CLICK HERE to see how to Stop the Server
|
|
|
Click for Next Topic
|
|
|