JSP Introduction
Simple JSP(Example-1)
JSP Err.Pag.(Example-2)
JavaBeans in JSP
JavaBeans(Example-3)
JSP Custom Tags
CustomTag(Example-4)
Design Patterns
Design Patt.(Example-5)
Bookmark This Site
|
JSP Custom Tags And Design Patterns - Project (Continue...)
|
Introduction
|
A well-designed custom tag library will typically contain a focused set of interrelated tags that provide common or integrated functionality. For example, one library might contain a set of debugging tags for use during page development, while another might provide extensions to the standard JSP Bean tags for improved flow control.
CLICK HERE to download this complete example (zip file)
|
|
|
Steps to Deploy and Run this Custom Tags and Design Patterns Project
|
- Write a html file and name it as AcceptInput.html
- Write a java file and name it as HelloTag.java
- Write a tld file and name it as Mytaglib.tld
- Write a jsp file and name it as Hello.jsp
- Set the path in the command prompt
-
set path=.;D:\progra~1\java\j2sdk1.5.0\bin;D:\Sun\AppServer\bin;
-
Set classpath=.;D:\progra~1\java\j2sdk1.5.0\lib;D:\Sun\AppServer\lib\j2ee.jar;
(OR)
Set the path in the system itself. CLICK HERE for details
-
Now compile the HelloTag.java. CLICK HERE to see how to compile
Note: It is important that this HelloTag.class file must be placed inside a folder hello -
After the java programs are compiled successfully, you can close the command prompt.
- Now goto Start -> Programs -> Sun Microsystems ->Application Server PE -> Start Default Server (wait till it start and then press any key). CLICK HERE to see how to Start the Server
-
Next goto Start -> Programs -> Sun Microsystems ->Application Server PE -> Deploytool. CLICK HERE to see how to Start the Deploytool
Now in the deploytool,
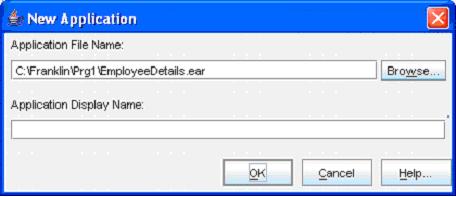
- Goto File ->New -> Application
(Click the Browse button)
-
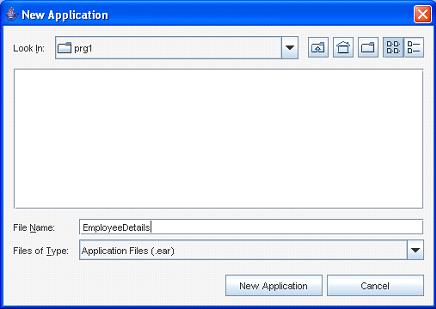
(Select the folder in the Look In dropdown box, and then give a file name JspCustomTagsAndDesign. Next click the New Application button)
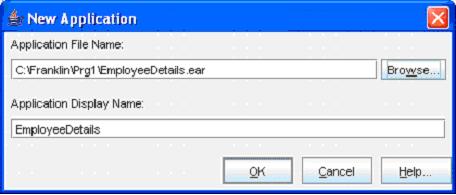
(Click the OK button)- Now goto File -> Save to save the file
- Next, goto File -> New -> Web Component
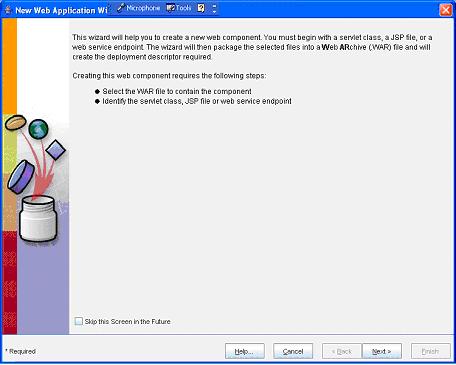
(Click Next button)
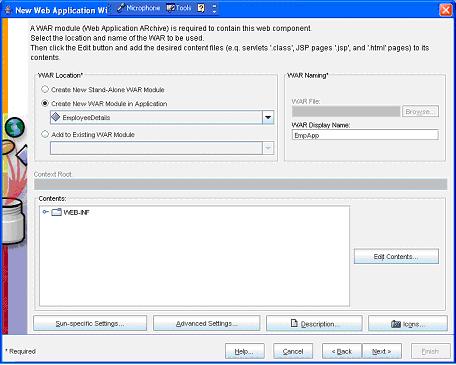
(Enter the WAR Name as CusApp and then click the Edit Contents
button)
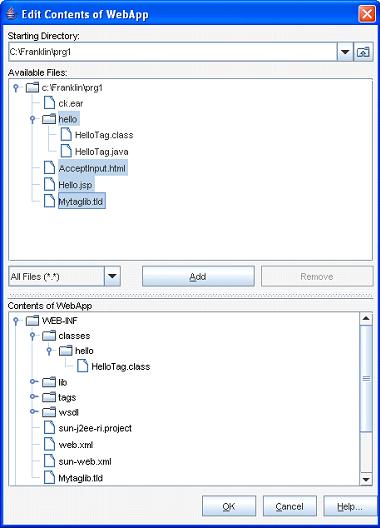
Note: It is important that HelloTag.class file must be inside the folder hello as shown in the figure
(Select all the .class, .jsp , .tld and .html files and click the Add button)
(Now click the OK button)
(Now click the Next button)
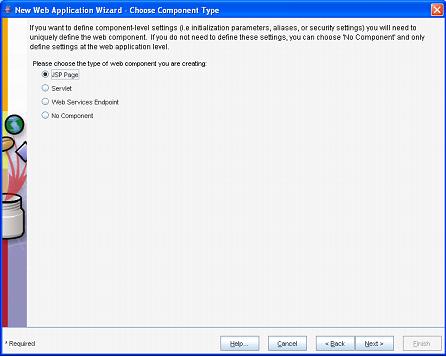
(Now select the JSP Page option button and then click the Next button)
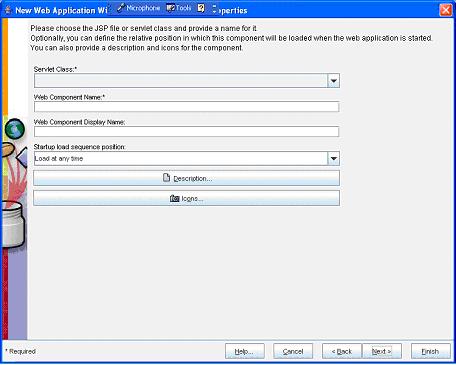
(Now select the JspCustomTagsAndDesign from the Servlet Class dropdown box)
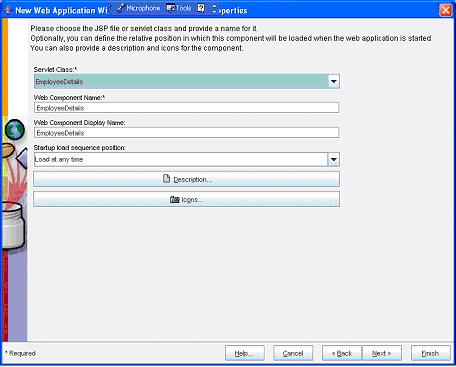
(Now select the Next button)
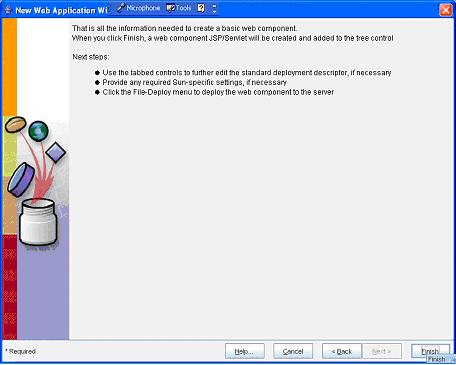
(Now select the Finish button)
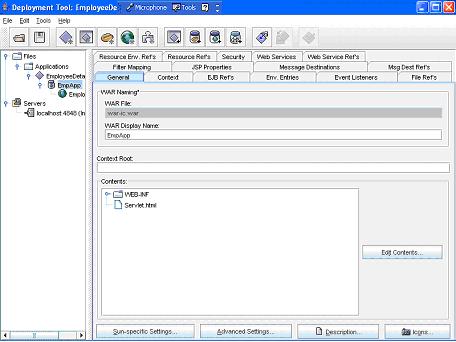
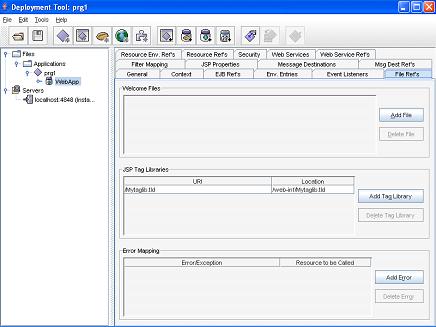
(Now select the CusApp in the left pane and select the General tab in the right pane. Here give a name design_tag in the Context Root text box)- Now select the File Refs tab in the right side pane and then click the Add Tag Library button in the JSP Tag Libraries. Here in the URI column type /Mytaglib.tld and in the Location column type /web-inf/Mytaglib.tld
- Now goto File ->Save
- Next goto Tools -> Deployee
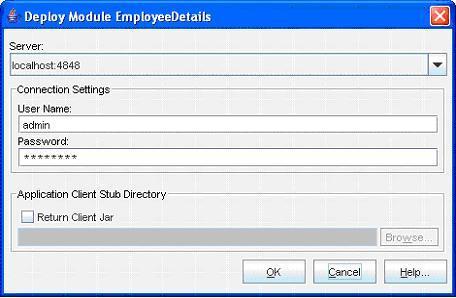
(Enter the User Name as admin and Password as password (CLICK HERE for password). Next click the OK button)
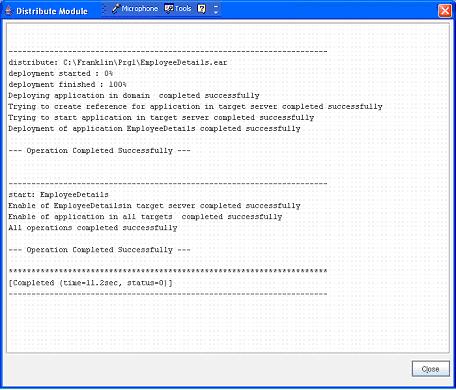
(Now a message --- Operation Completed Successfully --- must display. Next click the Close button)- Next goto File -> Exit to close it
- Now open an Internet Explorer and type the address http://localhost:8080/design_tag/AcceptInput.html
- Program completed Successfully
- To stop the server goto Start -> All Programs -> Sun Microsystems -> Application Server PE -> Stop Default Server. CLICK HERE to see how to Stop the Server
|
|
|
Click for Next Topic
|
|
|