Securing Web App.
Security... (Example-1)
Bookmark This Site
|
Securing Web Applications - Project (Continue...)
|
Introduction
|
-
To counter security threats, you can implement different security techniques, such as:
-
Authentication: Identifies a user.
-
Authorization: Specifies the rights assigned to an authenticated user to access resources of a Web application.
-
Data Integrity: Ensures that data is not modified while being transferred between the server and the client.
-
Auditing: Secures Web applications by maintaining a record of the rights assigned to different types of Web users.
CLICK HERE to download this complete example (zip file)
|
|
|
Steps to deploy and run Securing Web Application Project
|
-
Write a java file and name it as "LoginSuccess.java"
-
Write a html file and name it as "login.html"
-
Write a html file and name it as "error.html"
-
Set the path in the "command prompt"
-
set path=.;D:\progra~1\java\j2sdk1.5.0\bin;D:\Sun\AppServer\bin;
-
Set classpath=.;D:\progra~1\java\j2sdk1.5.0\lib;D:\Sun\AppServer\lib\j2ee.jar;
(OR)
Set the path in the system itself. CLICK HERE for details
-
Now compile the LoginSuccess.java. CLICK HERE to see how to compile
-
After the java programs are compiled successfully, you can close the command prompt.
-
Now goto Start -> Programs -> Sun Microsystems ->Application Server PE -> Start Default Server (wait till it start and then press any key). CLICK HERE to see how to Start the Server
- Important Note: Before deploying this project, you need to create a user in J2EE application server Admin Console. CLICK HERE for details
- Next goto Start -> Programs -> Sun Microsystems ->Application Server PE -> Deploytool. CLICK HERE to see how to Start the Deploytool
Now in the deploytool,
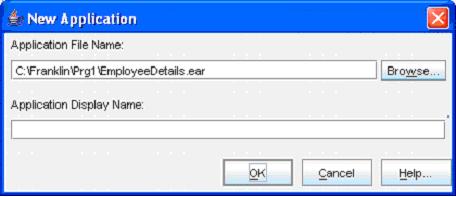
- Goto File ->New -> Application
(Click the Browse button)
-
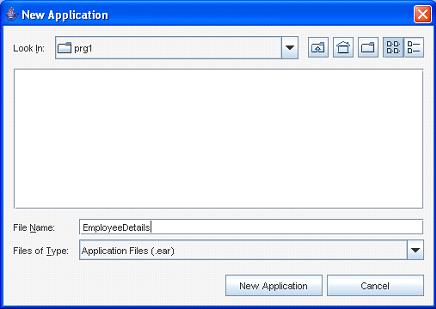
(Select the folder in the Look In dropdown box, and then give a file name "SecurityLogin". Next click the New Application button)
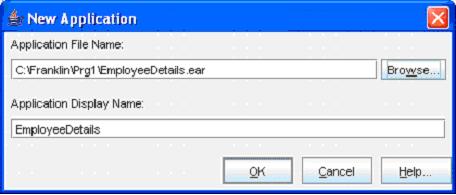
(Click the OK button)- Now goto File -> Save to save the file
- Next, goto File -> New -> Web Component
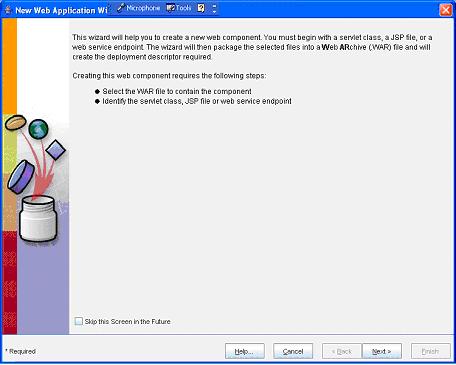
(Click Next button)
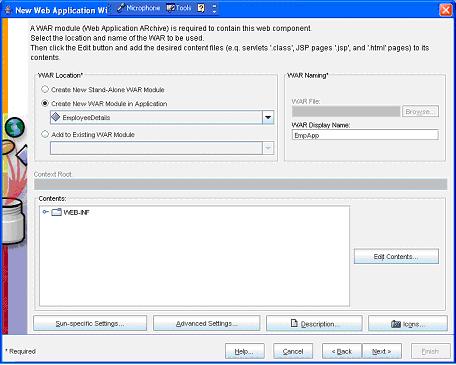
(Enter the WAR Name as "WebApp" and then click the Edit Contents
button)

(Note: It is importatnt that LoginSuccess.class, login.html, error.html need to be stored inside a folder security.
Select the LoginSuccess.class, login.html, error.html files and click the Add button)
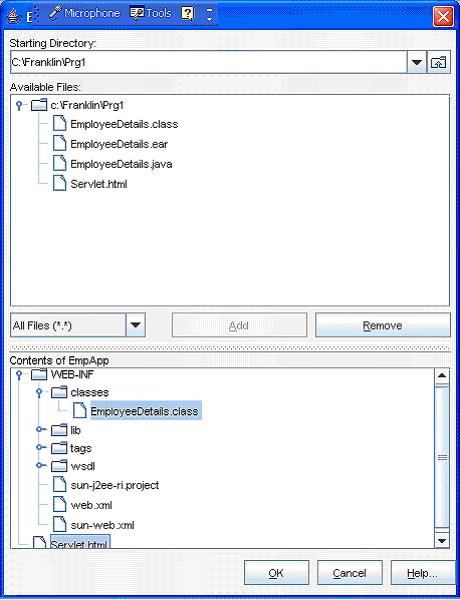
(Now click the OK button)
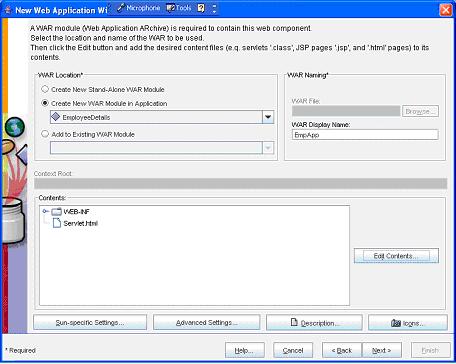
(Now click the Next button)
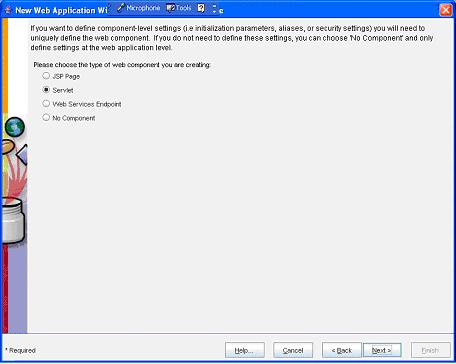
(Now select the Servlet option button and then click the Next button)
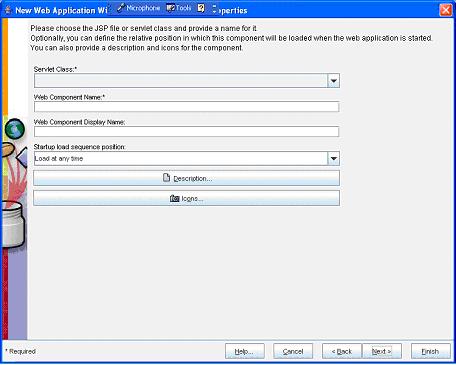
(Now select the "LoginSuccess" from the Servlet Class dropdown box)
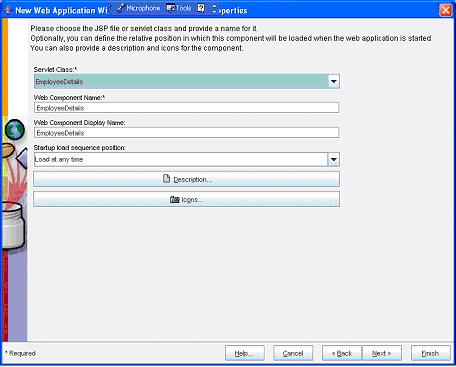
(Now select the Next button)
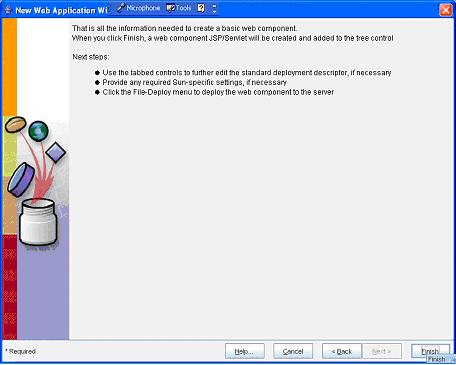
(Now select the Finish button)
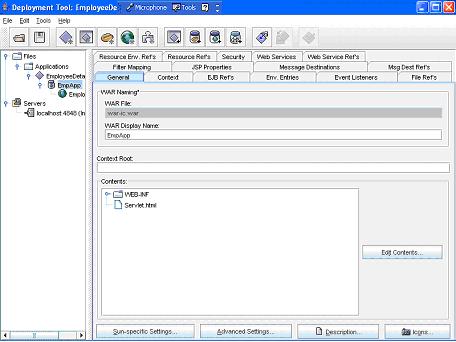
(Now select the WebApp in the left pane and select the General tab in the right pane. Here give a name "login_example" in the Context Root text box)- Next select the SecurityLogin in the left side
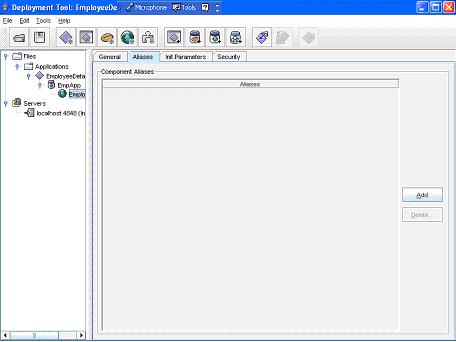
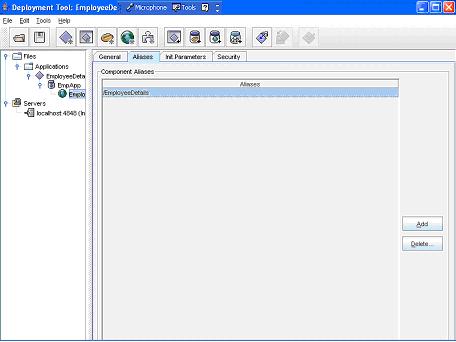
(Now select the SecurityLogin in the left pane and then select the Aliases tab in the right pane. Next select the Add button)

(Now add a name as "loginpage")
-
Now select the SecurityLogin (New application name) in the left pane.
-
Next click the Roles tab in the right pane
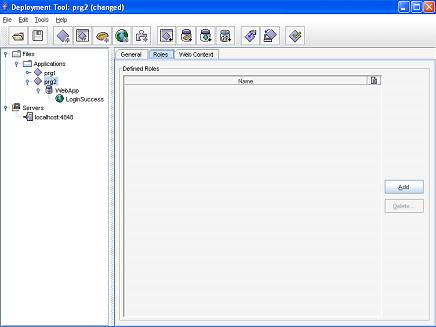 -
Now click the Add button to enter a new security role. Type a role name as User in the Name text field
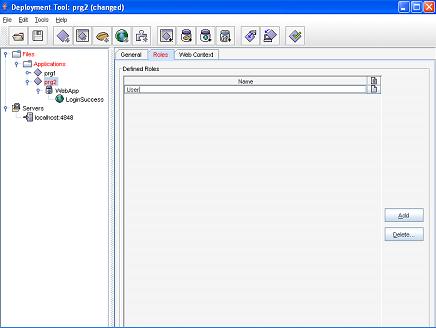 -
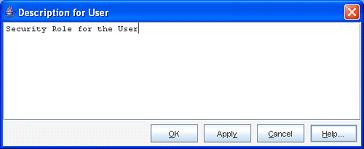
Now click the folder-paper icon near the Name text field. Now a Description for user dialog box will display
 -
Now enter any text in it. (For example, enter any text like "Security Role for the User")
 -
Now click the OK button
-
Now select the WebApp in the left pane
 -
Now click the Security tab in the right pane
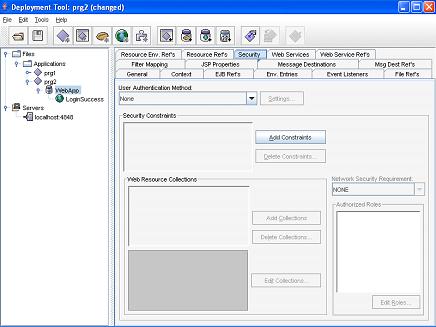 -
Select the Form Based from the User Authentication Method drop down box
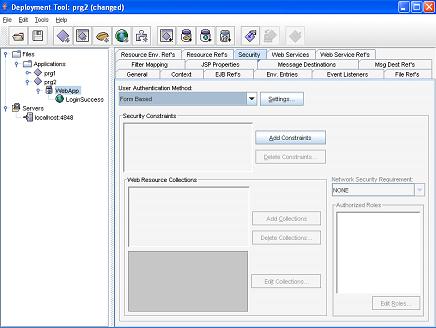 -
Now click the Settings button to open the User Authentication Settings dialog box. Next type the Realm Name as "Form Based Security", select the "login.html" file from the Login Page drop-down box and the "error.html" from the Error Page drop-down box
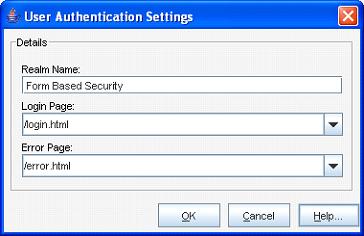 -
Now click the OK button
|
|
|
Click Next To Continue ...
|
|
|