EJB Introduction
Program. Restrictions
Stateless Session Bean
Stateless ...(Example-1)
Stateful Session Bean
Stateful ... (Example-2)
Entity Beans
BMP Entity Beans
Config. DB (Example-3)
BMP (Example-4)
Bookmark This Site
|
Stateful Session Bean - Complete Project (Continue ...)
|
Introduction
|
- Stateful session beans are appropriate if any of the following conditions are true:
-
The beans state represents the interaction between the bean and a specific client.
-
The bean needs to hold information about the client across method invocations.
-
The bean mediates between the client and the other components of the application, presenting a simplified view to the client.
-
Behind the scenes, the bean manages the work flow of several enterprise beans.
- Types of Enterprise Beans are
-
- Session Beans
- Stateless Session Beans
- Stateful Session Beans
- Entity Beans
- Bean Managed Persistent (BMP) Entity Beans
- Container Managed Persistent (CMP) Entity Beans
- Message-Driven Bean
CLICK HERE to download this complete example (zip file)
|
|
|
Steps to deploy and run this Stateful Session Bean Project
|
- Write a java file and name it as CourseHome.java
- Write a java file and name it as Course.java
- Write a java file and name it as CourseBean.java
- Write a jsp file and name it as Index.jsp
- Write a jsp file and name it as CourseCart.jsp
- Set the path in the command prompt
-
set path=.;D:\progra~1\java\j2sdk1.5.0\bin;D:\Sun\AppServer\bin;
-
Set classpath=.;D:\progra~1\java\j2sdk1.5.0\lib;D:\Sun\AppServer\lib\j2ee.jar;
(OR)
Set the path in the system itself. CLICK HERE for details
-
Now compile the CourseHome.java, Course.java, CourseBean.java. CLICK HERE to see how to compile
Note: It is important that this CourseHome.class, Course.class, CourseBean.class files must be placed inside a folder University -
After the java programs are compiled successfully, you can close the command prompt.
- Now goto Start -> Programs -> Sun Microsystems ->Application Server PE -> Start Default Server (wait till it start and then press any key). CLICK HERE to see how to Start the Server
-
Next goto Start -> Programs -> Sun Microsystems ->Application Server PE -> Deploytool. CLICK HERE to see how to Start the Deploytool
Now in the deploytool,
- Goto File ->New -> Application
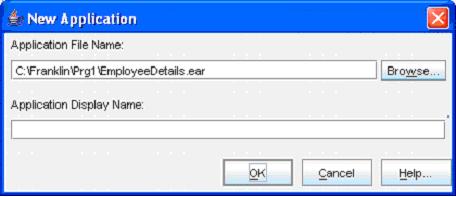
(Click the Browse button)
-
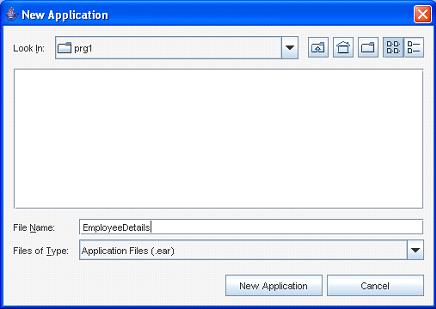
(Select the folder in the Look In dropdown box, and then give a file name StatefulBeanExample. Next click the New Application button)
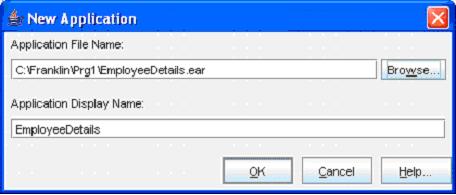
(Click the OK button)- Now goto File -> Save to save the file
- Select File->New->Enterprise Bean
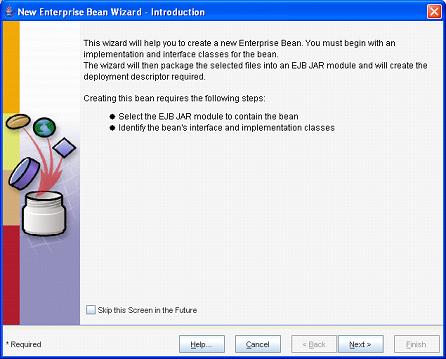
- Click the Next button

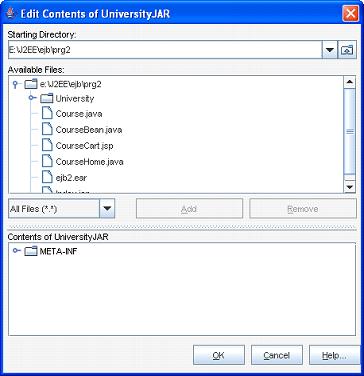
- Now give the JAR Display Name as UniversityJAR (Because the package name is University). Next click the Edit button
- Now select the Course.class, CourseBean.class, CourseHome.class from the folder University and click the Add button
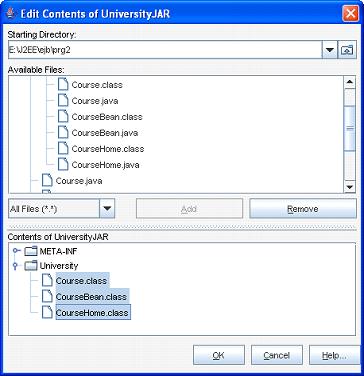
- Now click the OK button
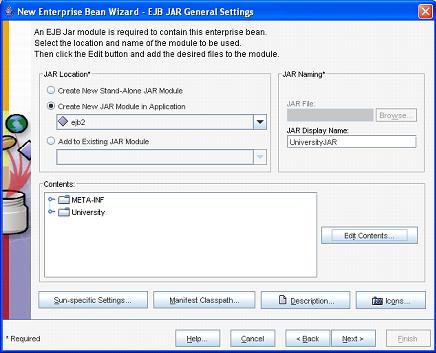
- Now click the Next button
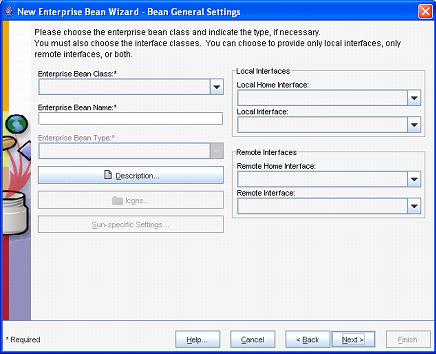
- Now select University.CourseBean from the Enterprise Bean Class drop-down box. Alos don't forget to change the Enterprise Bean Type to Stateful Session. Select University.CourseHome from the Remote Home Interface drop-down box. Select the University.Course from the Remote Interface
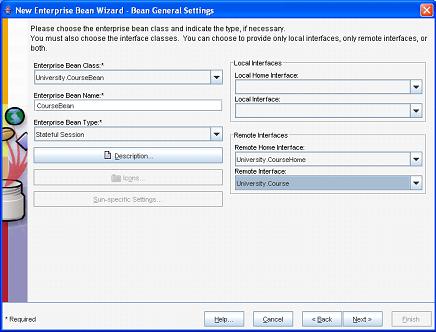
- Now click the Next button
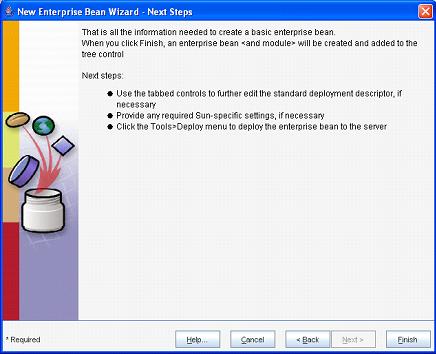
- Click Finish button
|
|
|
Click Next To Continue ...
|
|
|